Laminate, Engineered, and Solid Wood Floors And The Differences Between Them
Due to the myriad of choices, shopping for hardwood floors can be overwhelming and a little confusing. I often run into customers who, on a previous flooring purchase, thought they were getting one type of product but ended up with something, well lets just say, less. I will attempt, by the end of this article, to shed as much light on this subject as possible, hopefully making it a little easier for you to find the best wood flooring product for your budget.
Laminate Flooring
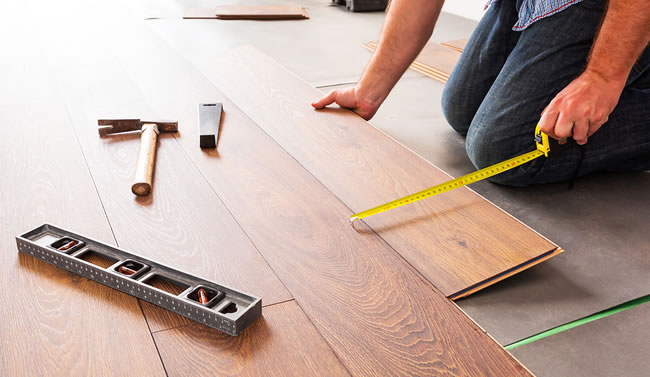
 We’ll start with the least expensive which is laminate. Laminate flooring is not made of wood. It is a mixture of melamine resin and fiberboard materials which really makes it a composite. This floor feels a lot like hard plastic. The top side has a hard simulated wood grain surface which can mimic any species of wood or style of wood flooring such as “hand scraped” which is very popular.
It often has an actual wood grain texture that can come fairly close to the look of real wood. The better the imitation the higher the price, usually. With most laminate floors the plank size does not vary, although the pattern can simulate varied plank size. Plank sizes can and do vary between styles and manufacturers.
I’m sure there must be some laminate product out there (and there are thousands) that has varied plank sizes, but I haven’t run across any yet.
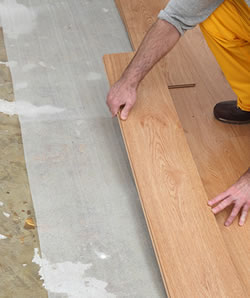
Installation of laminate flooring is relatively easy as there are no fasteners because it simply snaps together. A thin foam layer with a plastic vapor barrier is rolled out on the sub-floor then the laminate is laid on top of it. This is called a floating floor.
The flooring is held down by gravity and the trim around the edge of the room. It usually makes a hollow sound when walked on which bothers some and not others.
Laminate flooring is a good, cheap, easy to clean alternative to carpet, which is only clean when new. (yes we’re biased but it’s true!) Prices run from around $5/ft to $11/ft or even more depending on who you hire to do the work. (FYI: our customers never pay “even more”)
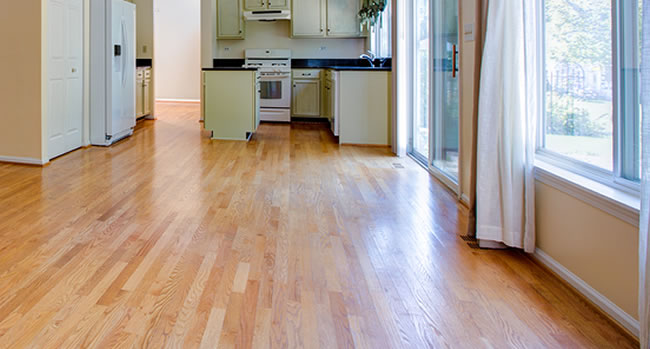
Engineered Flooring
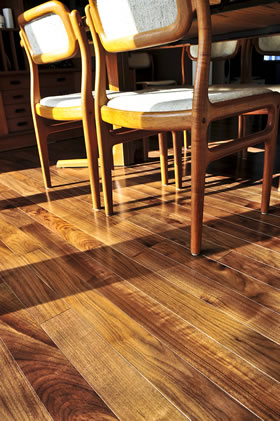 Engineered flooring is simply plywood cut into flooring shaped strips with the top layer being the hardwood. There are several factors which determine the quality and value you are getting for your money. The first is the thickness of the wear layer which is the top layer and the wood species and style you chose.(Honey Oak for example).
The thicker the wear layer the less likely the ply underneath, which is not hardwood, will be exposed when a chip or dent occurs. Another benefit of a nice thick wear layer is that it can be sanded and refinished if and when the finish is worn through. That being said, there is nothing wrong with a floor with a thinner wear layer if the price is right. On the surface they look same as a floor with a thick wear layer, but they should cost less.
Another telling factor is the overall thickness of the flooring. A thicker board, when nailed or stapled to your sub-floor, will feel more solid and be less likely to develop squeaks down the road.
Another nice benefit is the added strength of an extra 1/2 or 5/8” of wood stapled to your sub-floor. It just feels more solid. Again, I’m not knocking thinner floors, they’re just as visually appealing. A budget is a budget, but if you know what you’re buying you can keep from getting burned or maybe get more for your buck.
Finish quality matters, but it’s hard to differentiate between a good finish and a bad. When comparing finishes all you have to go on is what the manufacturer says they do and the ridiculous warranty periods offered. Who’s really going to make a warranty claim 30, 40, or 50 years later and make it stick? Will you be in that house? Will the manufacturer still be in business? In my humble opinion, finish is the least important component for engineered wood floors. As long as it looks good and is kept clean it will last.
Most retail flooring salesmen and manufacturer representatives will not agree with this, but this is our experience. There are several different installation methods used for installing engineered floors. The sub-floor type is usually the factor determining which method to use. With a concrete foundation the floating floor method discussed in the laminate section is permissible if the manufacturer allows for this application.
In addition to being the least expensive method, the finished floor will have a softer feel and the slightly hollow sound when walked on, as with the laminate described above. The other method for installing engineered flooring over concrete is the glue down method. With this application the floor is glued directly to the concrete using a urethane adhesive or mastic. This method produces a much more solid feeling floor. It is also more expensive for three reasons. First, the glue is expensive. More so if high quality glue is used (our company uses nothing else, using cheap glue is like buying cheap tires for your car, you might be OK with them now, but your way more likely to have problems down the road).
Second, it takes longer. Third and most importantly, a higher level of expertise is required. This all equates to more money. The third and most common method for the installation of engineered wood floors is the nail or staple down method. This obviously can only be done over a wood sub-floor. This method entails rolling out a paper thin material called craft paper, or building paper which acts as a moister retarder. Some call it a vapor barrier but that is a misnomer. It can not bar water from passing through it as thousands of holes are poked in it when the flooring is stapled down.
So a better explanation of it’s purpose is that it slows down the transfer of moister from underneath your house to the flooring inside, and vice versa, between the wet seasons and the dry ones enough so that the floor doesn’t experience the wide fluctuations of the outdoors. If there is a “water problem” it won’t help.
Over the craft paper the flooring is stapled down using a tongue and groove system. The price of engineered flooring should be, but isn’t always, proportional to quality. In fact it can vary by a wide margin depending on who is selling it. I couldn’t tell you how many times I’ve been called to bid a job to install a floor where the customer bought the material themselves, either over the internet or from a local retailer, and when they told me what they paid I had to bite my tongue and somehow muster up a “Wow, what a great deal!” with a straight face.
I didn’t have the heart to tell them the truth and it was too late anyhow. Don’t get me wrong, we make money on material, we just don’t pray on the uninformed, only the informed. Kidding!
Realistically, the price range for an engineered flooring installation, including the wood, will usually fall somewhere between $7 and $12/ft. A very high quality product, one with a reputation for being “the best”, can raise the cost of a flooring project considerably, as will a cheap labor quote lower it. The elevated price tag for the quality product is usually worth paying, if you’re the type who spends the money to get the best. Conversely, the savings the bargain labor amounts to is generally right in line with the decreased quality of the finished product.
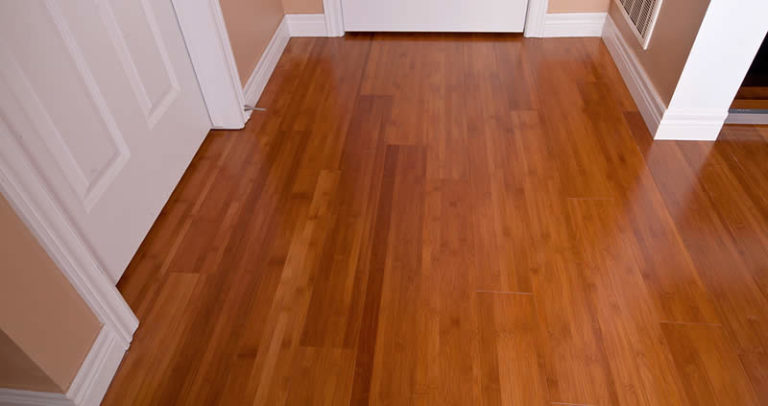
Solid Prefinished Wood Flooring
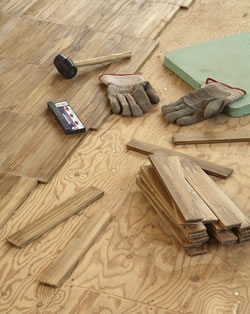 The individual planks in a solid wood floor are composed of a single piece of the greenest thing Mother Earth ever produced, trees. They’re chopped down, cut into flooring, kiln dried and delivered to your house where they could likely be for 150 years or more.
The domestic trees used for wood flooring are grown mostly in the eastern half of the U.S.. Sustainable forestry practices are becoming more and more prevalent which means our forests and resources should always be plentiful.
Solid wood flooring comes either factory finished, or unfinished which is sanded and finished after installation. Installation procedures are basically the same for both types. The only difference being that factory finished flooring, which has minor defects as well as a few nail holes in the surface, will need to be detailed with filler putty before the job is considered complete.
One of the benefits of going the prefinished route is, once the installation of the floor and baseboard are complete, it’s move in time. One major drawback though is that, not being sanded after installation, the floor doesn’t end up as flat as a floor which is sanded and finished in place.
High and low spots in the sub-floor are sanded out or filled in accordingly, and the end result is good, just not as good as a floor that has been run over by a machine that will accept nothing in it’s way as being flat enough.
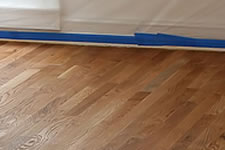
Another drawback is that, again since it won’t be sanded flat, something called a beveled edge is an unavoidable necessity. This is common with all prefinished wood floors, engineered and solid alike. A beveled edged plank, when installed next to another beveled edge plank, forms a groove between the two which extends the full length of the floor and on the end of every board.
In recent years, milling tolerances have gotten closer so now the bevel has evolved into a “micro-bevel”, which is better but still a dirt catcher. The third and most creatively annoying drawback is that you are stuck with whatever colors are offered.
The drawbacks, in most cases, don’t outweigh the benefits. A 3/4” thick solid prefinished floor has the same life span as one that is sanded and finished on site. You can get them in a hand scraped style or flat. If your concerned with the slightly increased inconvenience and expense of a floor that is sanded and finished in place, then a solid prefinished wood floor might be for you; however, often the difference in cost between the two is very little or nothing.
Solid Finish-In-Place
 A solid, finish-in-place, wood floor is installed the same way a solid, prefinished wood floor, is installed. First, the building paper is rolled out, then the wood floor is installed over it using the tongue and groove system. After the installation is complete, sanding begins.
First, a large, heavy sanding machine is run over the entire floor in a mowing fashion using a very rough grit sandpaper. A smaller sander called an edger is used along the walls and where the big sander can’t be used. Next, every nick crack, and nail hole is filled using a water based filler. When the filler dries, the floor is mowed again with the big sander, only this time a finer grit sandpaper is used.
This pass with the big sander removes excess filler while further smoothing the floor (If this sounds a bit like a tutorial, be my guest and use it as one, do it yourselfers are some of my best customers, hehehe…).
After the last pass with the big sander, some further smoothing is done with other machines, followed by vacuuming. Stain is then applied. The stain is usually allowed to dry overnight unless the job is small and a quick dry stain is used. If the job is small enough, and the stain is applied early enough, finishing can be done the same day. From the time the last coat of finish is applied to the time when light foot traffic(stocking feet only) is safe is usually around 3-5 hours.
Furniture placement should occur no less than 24-48 hours later, depending on the weather.(just check your weather rock, if it’s wet, dry times will be extended)
Engineered Finish-In-Place
Yes, there is such a thing as an engineered finish-in-place wood floor. This type of wood flooring is tailor made for those occasions when there is a concrete sub-floor and a finish-in-place floor is desired.
The wear surface, which, if you recall from the section on engineered wood flooring is the actual hardwood layer on the top surface of the flooring plank, is much thicker on a finish in place engineered wood floor than most prefinished engineered wood floors. It’s almost as thick as the wear surface on a solid wood floor which is 5/16” thick. This is the wood above the tongue or the thickness of the top section of the groove side of the board. (I hope that wasn’t too confusing)
Engineered finish-in-place flooring Is glued down to the concrete using a wood flooring adhesive. The sanding and finishing process is exactly same as with solid finish-in-place flooring. Hopefully the information provided here will help those of you who are thinking of purchasing a wood, laminate, or engineered floor to make a more educated decision. We at J & J Wood Floors are happy to answer whatever flooring questions you have as well as provide any wood flooring service you may need.